Chip Repair on a Pressed Steel Bath
Chip Repairs
Of all the repair work we do on Baths, sinks and the like, the most common is repairing a chip or chips on pressed steel baths. Pressed steel baths have many advantages over cast iron. They are lighter, cheaper and easier to install. They also have advantages over most acrylic baths. They are longer lasting generally. There is less flexing and movement of the bath when in use so problems such as putting your knee through the bath or cracks appearing, as sometimes occurs with acrylic baths, does not occur with a pressed steel bath.
But a major dis-advantage of pressed steel is the fact of the enamel being very hard and brittle. So much so that when there is an impact on the surface of the bath, the enamel can’t flex or absorb the impact and often a chip of enamel is knocked of the surface of the bath. Often (in fact usually in my experience) the chip exposes the metal below the enamel. As the metal is treated and black, it really shows up against the enamel.
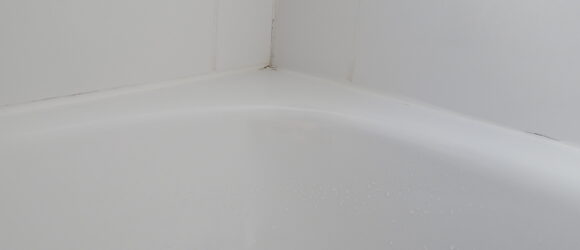
Here is a picture of a chip on a pressed-steel bath. This was a repair done in a home near Rochester:
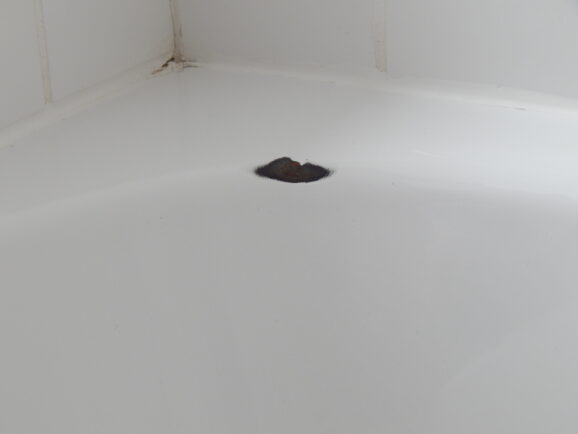
Chip on a pressed steel bath
The first issue with a chip is cosmetic. It just looks wrong in a bath and does tend to catch the eye. The second issue is that left long enough, rust can start to form. And that, left long enough, can work its way though the steel of the bath and you can end up with a hole.
The good news is that it does tend to take a long time for this to happen, especially on higher end pressed-steel baths which tend to use a thicker steel in the construction of their baths. But it is best to repair the chip. as soon as possible.
So a repair of a chip on a pressed steel bath serves two purposes: the first is cosmetic and takes the eye of the damages area. The second is that the repair keep the water from being in direct contact with the steel and so prevents rusting or corroding of the metal below.
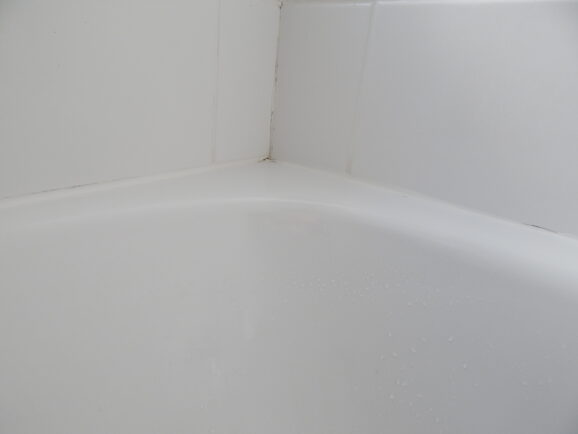
The chip in this pressed steel bath has “disappeared”
It would seem that for most people, the primary reason to get a chip repair done is cosmetic. We can certainly rectify this.
The level of repair we go for is that if someone was to walk into the room after we have done the work, they wouldn’t see the repaired area, their eye wouldn’t be drawn to it and catch on it. Often however, we can get it to the point where the customer themselves cannot see the repair or locate where the original chip was located.
The secret to getting an invisible repair, or very close to invisible, is that we make the colour onsite to match the item we are repairing. We don’t use a selection of several shades of white (most repairs, especially of pressed steel, are some shade of white) and go with the closest. What we do is we actually build the colour onsite to match the specific item we are repairing. It can be a lot of work trying to match a colour onsite, especially if the lighting in the room isn’t great and it adds a lot of time to the process but it’s the best way we have found to make repair as good and as invisible as possible
George Jennings Brought Back From The Dead
[pe_estro_slider id=”5″]
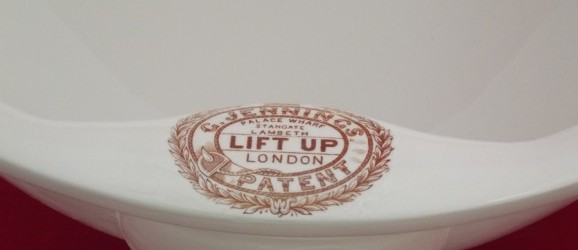
This is a rare tilting sink by George Jennings. We do not have an exact date but these sinks were quite early (circa 1860) and were one of the designs one comes across before the waste and overflow became pretty much the norm for basin design.
Here is the basin in situ prior to restoration work.


George Jennings himself was one of the giants of Victorian Sanitation. It was his toilets which were introduced at the Great Exhibition of 1851 in the Crystal Palace in London. This was the first time many people had the chance to use a flushing toilet and many, many people went ahead and did so. Over 800,000 people paid over a penny each to gain access to this new and exciting experience. It seems strange to us now but the impact the toilets at this exhibition made was massive. The phrase “to spend a penny” meaning “to use the loo” stems from George Jenning’s toilets. And within 4 years of the exhibition there were over 200,000 flushing toilets in London alone. Now the very idea of not having a flushing toilet in your home is completely foreign and unacceptable.
The tilting sink was a design the allowed the sink to swivel round on two pivots to be emptied. There was no plug hole.
It looks like the tilting sink was introduced after 1851 but before the turn of the century, as it seems to appear after the Great Exhibition of 1851 but was still referred to as “Jennings’ patent tilt-up and lipped lavatory”. What we now call the “wash basin” was called the “lavatory” until the turn of the century! A bit confusing sometimes. When discussing antiques we do sometimes forget and call the item a lavatory instead of a sink.
The basin itself was in a pretty sorry state and had many cracks and repairs on it. It appears as though the basin had had different repairs done to it on at least 3 separate occasions. Some of the repairs were held together with glue, some with a white hard paste and one particular area with staples. Staples or riveting was a common way to repair ceramics from the 18 century up until approx. 1910. We think this basin may first have been repaired circa 1885.
Here are some pictures showing the basin prior to restoration and with the poor repairs.


Some of the repaired pieces of porcelain were sitting proud of the rest of the sink, especially around the edge.
The first thing that was done was to break the bowl back down into its pieces and clean off the glue, etc that had been used in the previous repairs.

Then the bowl put back together with the parts fitting as tightly together as we could get. Sometimes this required grinding small areas away to allow the pieces to slip together. Once the basin was all back together there were still some areas sitting a little high.

To handle the high areas the basin was treated with high build primers and fillers to smooth out these areas.
Then the basin colour was matched and the basin sprayed.
The brass pivots need to be re-attached, but this is going to be left until the basin gets back to its home and the positioning of the pivots can be checked to ensure they are fixed in exactly the right place.
Then the pivots will be fitted in place using a putty mixture which is what was used originally for this type of work.
Here are some pictures of the basin after restoration. Hopefully we will get some pictures from the client with the basin in situ again and ready to be used again for another hundred or so years!


Bath Repairs, Chip Repairs and Cracks in a Bath

The Bath Business delivers a bath repair service for baths that have chips, scratches, cracks, scuffs, dings etc on the bath’s surface.

There are many instances where a bath in otherwise good condition has had its surface chipped or damaged. In such cases a bath repair is a definite option. Rather than resurface the whole bath, which is our mainline service, we would do a localised bath repair to the damaged area only.
If the bath has numerous chips however or the bath repair would need to be done over an extensive area we may well recommend resurfacing rather than attempting to do a bath repair over a large area of damage. Also, when repairing a bath the repair work works best on new baths that have been damaged. If your bath is 20 years old it may well be worth getting the bath resurfaced whilst having any damaged repaired at the same time.
") Also if the bath is in a dull or worn condition and also has a chip or two we may recommend resurfacing as opposed to doing a chip or bath repair. Bath resurfacing encompasses repairing any chips. The reason we would recommend resurfacing in an older, worn bath rather than a bath repair or chip repair is because at the time of the repair the bath repair would be done to match the bath. If the bath is worn the worn areas will continue to attract dirt and gradually look worse. The bath repair will not attract dirt so eventually there will be a discrepancy and you will be able to see where the repair was done. A bath repair or chip repair works best on a relatively new bath.Try and tell us as much as you can about the bath when you inquire so we can recommend the correct course of action.
Also if the bath is in a dull or worn condition and also has a chip or two we may recommend resurfacing as opposed to doing a chip or bath repair. Bath resurfacing encompasses repairing any chips. The reason we would recommend resurfacing in an older, worn bath rather than a bath repair or chip repair is because at the time of the repair the bath repair would be done to match the bath. If the bath is worn the worn areas will continue to attract dirt and gradually look worse. The bath repair will not attract dirt so eventually there will be a discrepancy and you will be able to see where the repair was done. A bath repair or chip repair works best on a relatively new bath.Try and tell us as much as you can about the bath when you inquire so we can recommend the correct course of action.
If you are a contractor & you are trying to have a bath repaired before a client sees it let us know. We make the repair as invisible as is possible as you look face onto the repair. But it will never be completely invisible from all angles. For example, if you painted half a wall exactly the same colour as the wall had already been painted 6 months earlier you would be able to see the edge if you looked for it. Similarly with a chip repair. If you keep looking for the repaired area you will eventually find an edge. If you are a contractor and it is important that the repair is not visible from any angle we would recommend you have the whole bath resurfaced. Any chips, dings or scratches will be rectified with the bath being completely resurfaced.
") The type of repairs that can be done are chips to the enamel of cast-iron and pressed steel baths, scratches on enamel baths and pressed steel baths. Dents or dings to plastic or acrylic baths as well as scratches, cracks and also small holes punched through the surface of plastic or acrylic baths.
The type of repairs that can be done are chips to the enamel of cast-iron and pressed steel baths, scratches on enamel baths and pressed steel baths. Dents or dings to plastic or acrylic baths as well as scratches, cracks and also small holes punched through the surface of plastic or acrylic baths.
The procedure for doing a Bath Repair is to fill the chipped or dinged area and sand smooth.
Next, the material which is to be sprayed over the filled area is colour matched to the existing surface of the bath. We do the colour matching on site.This is the most important part of a Bath Repair and this procedure does require a lot of skill and experience.
Even if the existing surface is white, there are many, many shades of white. If the colour isn’t matched then the repaired area will stand out and catch the eye. A badly colour matched repair can look like someone has been in with a jar of tipex. If you have tried to repair a chip or ding yourself you’ll already have observed this.
Another difficulty can be the lighting. In one bathroom the lighting was such that although the tiles on the floor were exactly the same as the tiles on the walls, the tiles on the walls looked considerably darker. So a repair in this bathroom had to be carried out with a lot of expertise to get the exact colour match.
Once the colour is matched then the filled area is airbrushed over. The area may then be polished if any dust has landed on the wet material.
The procedure for a bath repair can also be applied to shower trays, wash hand basins and well also toilets.
Repairing cracks in an acrylic bath requires a completely different procedure. A successful repair to a crack is often dependant upon gaining access to the underside of the bath or cracked item.
It is best to contact The Bath Business directly for advice on how to repair your bath.


 Add us to your circle