Large Victorian Roll-Top Bath with original plumbing Resurfaced
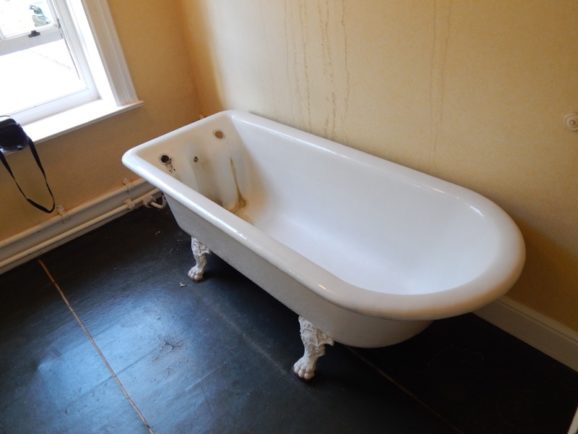
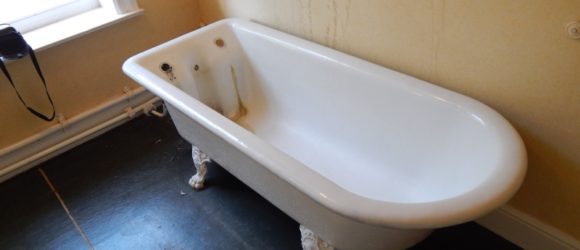
Roll Top bath before Resurfacing
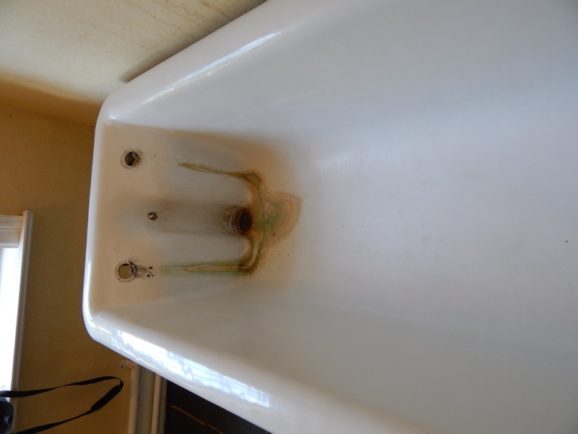
A Roll Top Bath Before The Bath business Restored it!
We were asked to resurface the bath above which was in a farmhouse in the Reading area. What you can’t really tell from the pictures is just how much bigger this bath is compared to a modern standard bath. This one was a beauty!
The bath itself is a great example of an original Victorian roll-top bath which still had the original lead plumbing which you can see below:
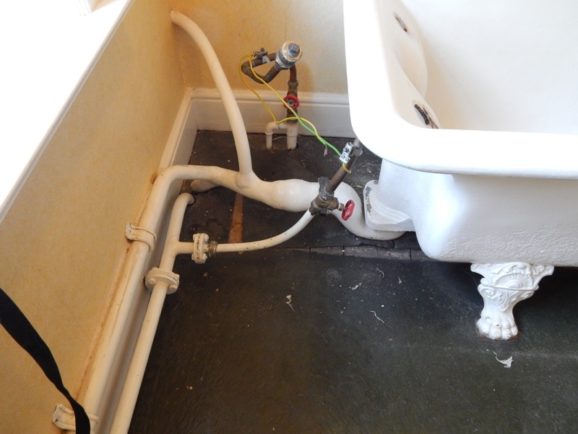
Lead Pipeing
The taps for the bath have been removed by the owner to be restored offsite. We do tap restoration also. (Please note: We could have restored the bath itself with the taps on but it made sense for the owner to get everything done, taps and bath, at the same time)
The bath itself was in very good condition apart from the wear and staining below the taps and around the waste area. Here the staining was very noticeable and unsightly.
Below you can see the bath after it was restored and the staining sorted out:
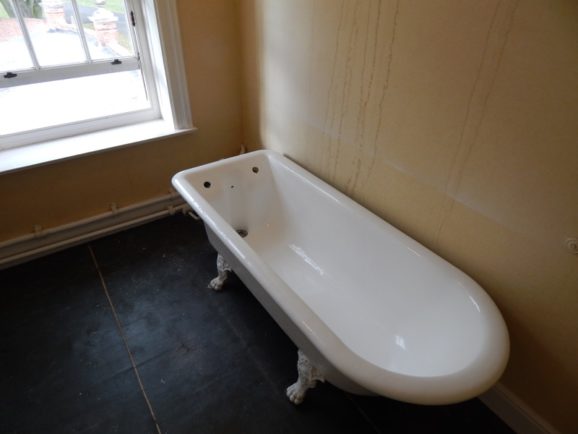
Roll Top Bath after Resurfacing
Stained Cast Iron Bath & Soap Dishes Resurfaced
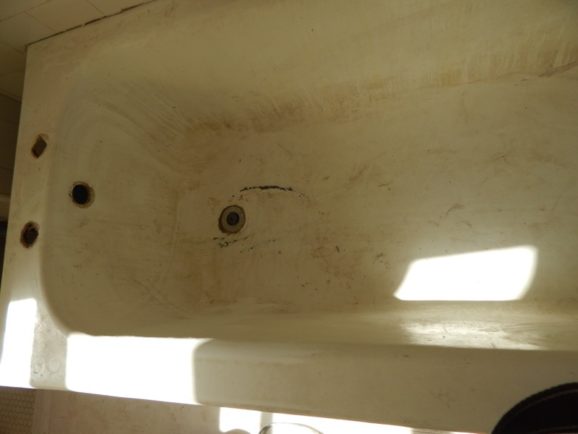
Stained cast iron bath with worn soap dishes circa 1930’s
This is a bath we restored in the Belmont Hill area of London. The bath, tiles and soap dishes were all original. The bath was a really good size and nice and deep.
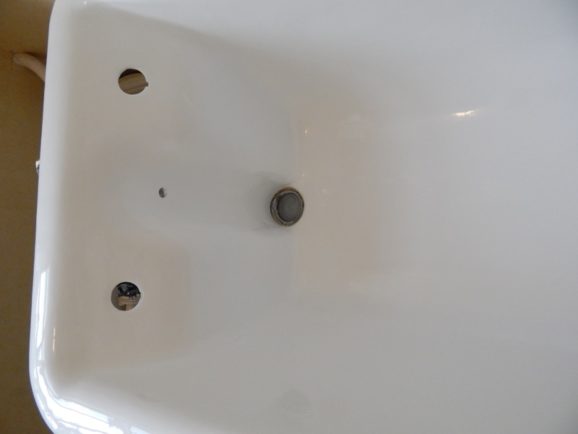
The bath and one of the soap dishes however had had their enamel coating completely worn away back to the cast iron in places and the bath was also extensively stained and worn over most of its surface.
In the picture above you can see the staining which is over most of the bath. And around the waste you can black marks. This is where the enamel coating on the bath has been worn back to the cast iron below.
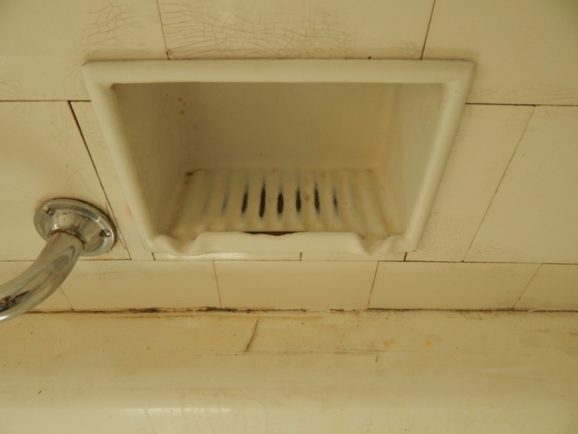
Worn Soap Dish
There were two soap dishes built into the wall above the bath. Like the bath itself, these were made of cast iron which was then enamelled. In the picture above you can see that the enamel on one of the dishes as been worn back to the cast iron through decades of use.
We were able to restore the bath and soap dishes in a day, and they were ready to use the next. You can find out more about our process here.
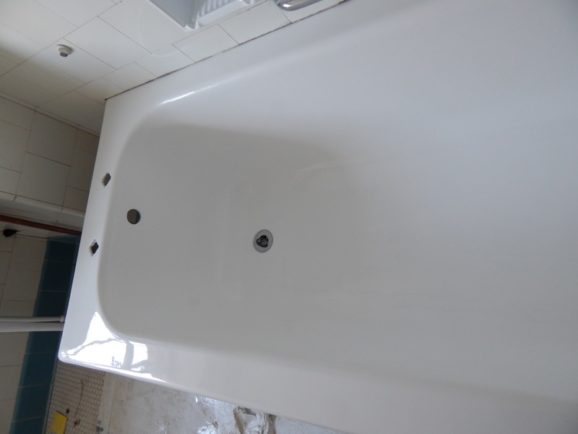
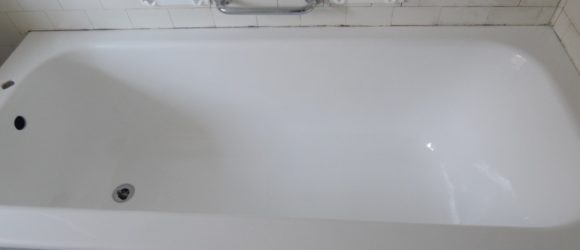
Here is the result of the bath being re enamelled.
The above picture shows the finished bath with the staining and wear issues all handled.
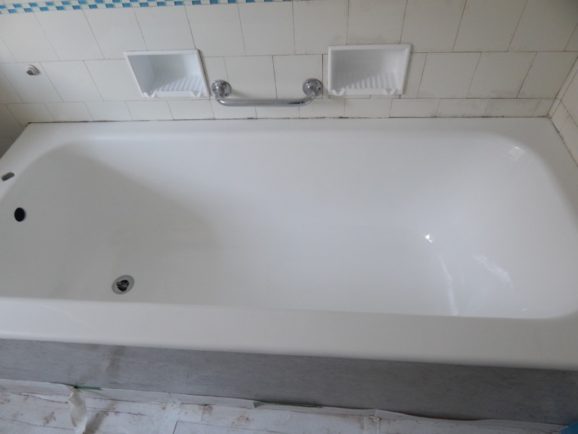
Lovely bath & Soap dishes after we resurfaced it.
And finally, here we have the bath and both the soap dishes after completion. What do you think?
Badly Damaged Sink Fully Restored
In Spring 2020, just before the lockdown, we were asked to repair and restore a bunch of sinks for a restaurant in Central Birmingham. This was part of the Dishoom group. The restaurant was being set up using antique and old fixtures to give it a “shabby chic” feel. It looked amazing!
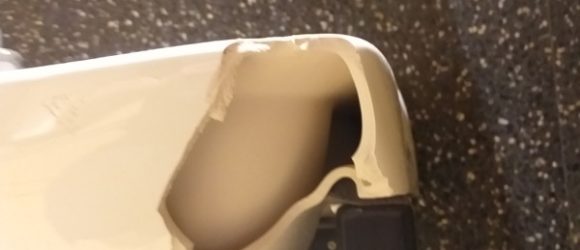
Eight old basins had been sourced for the male and female bathrooms. But in the process of moving them and getting the old fixtures removed from them, about 6 sinks in total sustained damage. Some of it was just surface damage. Burn marks from cutting away the taps, that kind of thing.
But two sinks in particular had had chunks knocked off them.
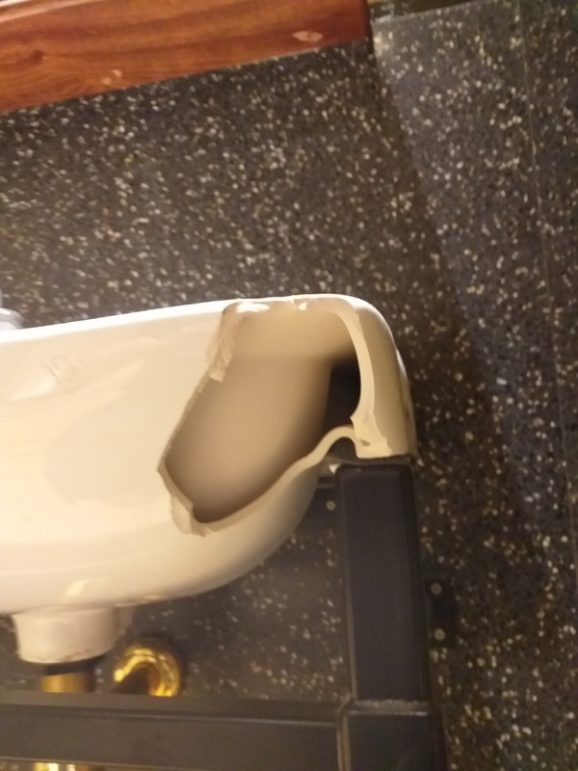
Damaged Basin before Repair
The problem faced by the restaurant was that there were no more of the old sinks available. They needed to be able to use all eight sinks. And there was a RUSH to get them all done so the restaurant could open on time. We ended up sending a top technician and our Head technician to ensure all the basins were repaired on time.
We were able to repair all of the 6 damaged sinks. Including the two sinks which had sustained the more extensive damage.
The sink above, as well as having had the corner knocked off, also had two large hairline cracks coming away from the damaged area. In total the hairline cracks were in total about two feet long (one of the cracks went along the front top edge of the sink away from the damaged area all the way to the other side)
We repaired the cracks so these were sound, sorted out the missing corner and made the whole area good so the damage and cracks couldn’t be seen. What do you think?
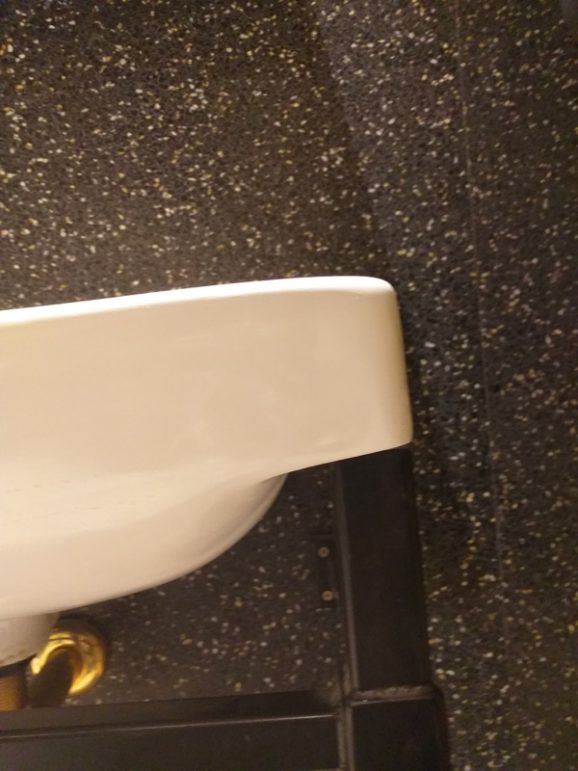
Basin after Repair
Resurfacing a Coloured Bath
Resurfacing a Coloured Bath
Primrose Bath.
Whilst most the baths we do are white, there are people who have baths on their homes which are coloured.
These baths were often part of a suite of bath, toilet and sink, all done in the same colour. They tend to be very good quality bathroom suites and therefore worth keeping.
And as long as the toilet and sink are not bashed or chipped, they tend to remain looking pretty good for many decades.
However, the bath will often start to get “bleached out” around the base of the bath. The top of the bath can look like new but the base of the bath starts to look like it has faded and gotten dull.
An example of this was a bath we were asked to resurface that was part of a primrose coloured suite in a little village near Slough.
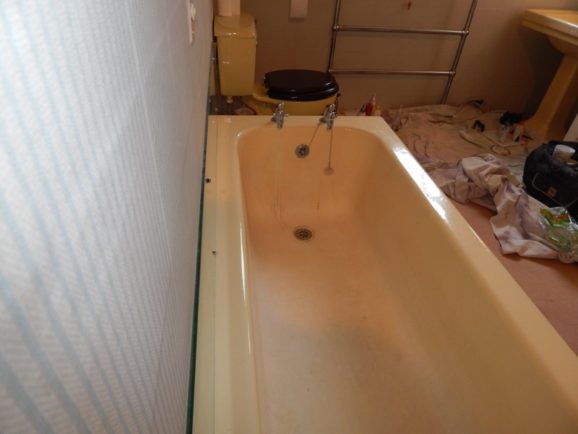
As you can see here in the picture above, the base of the bath looks a lot less shiny than the top part of the bath. You can hopefully make out that the base is a bit whiter or bleached. It was a bit dull the day the picture taken so some details not showing up so well.
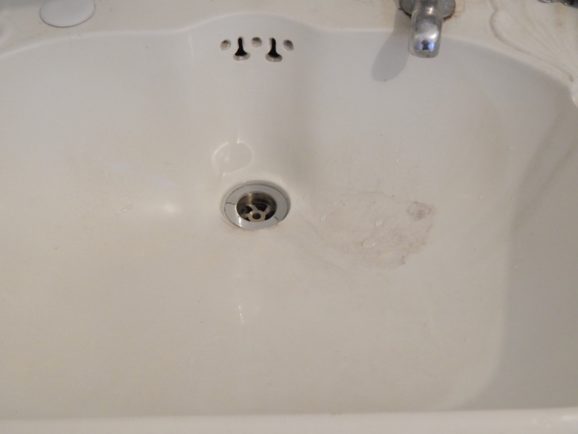
There is also fairly prominent staining in the waste area of the bath. You can see the staining better in the picture below.
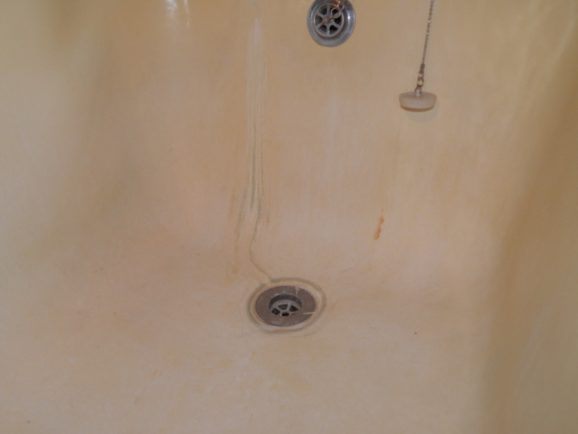
Just to complicate matters a little, the original toilet had been broken and replaced with another which wasn’t quite the same colour as the bath and sink. It was slightly darker and greener. You can see this colour difference in the top picture.
We could have matched the bath to the colour of the toilet, and in some ways this made a lot of sense as the toilet and bath were close to each other and so your eye naturally compared them.
However, the customer wanted the original colour of the suite kept. A colour was built up onsite, matched to the bath and the sink.
The next day the bath was prepared (masked up and limescale removed, etc) and the colour was applied to the bath.
In the picture below you can see the result. It was a lot sunnier that day, so everything looks a lot lighter! However, you can see the colour of the bath matches the sink on the top right hand side.
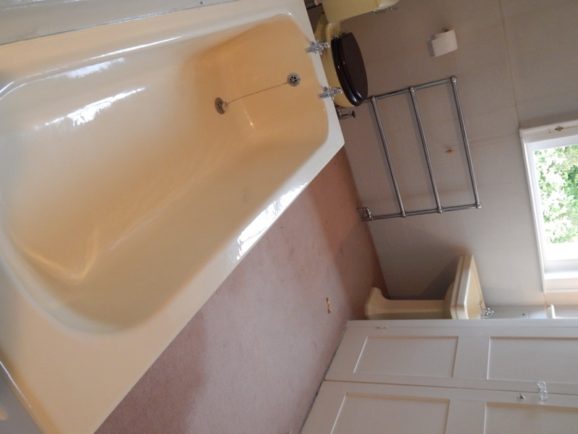
The bath is now a uniform colour and uniformly bright and shiny with all the staining handled.
Repairing A Cracked Sink!
Edwardian Sink.
Cracked Sink Repair.
The cracked sink repair outlined below was done for an Edwardian Museum in Brighton. The Museum is actually a large house which was left to the local council by a prominent local family. The house shows what the homes of the rich were like over 100 years ago.
In one of the bathrooms there was an original sink what had a large, curved crack and a couple of hairline cracks around the waste. The sink itself had a fair bit of staining and wear which is not unusual for something this old.
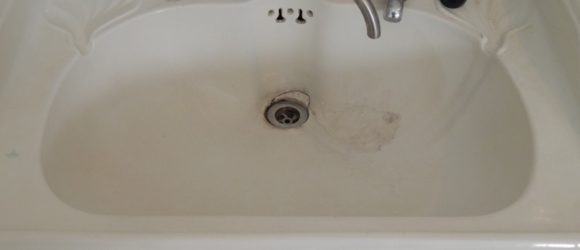
This is the sink below. It has some nice features like graceful soap dishes and an unusual overflow.
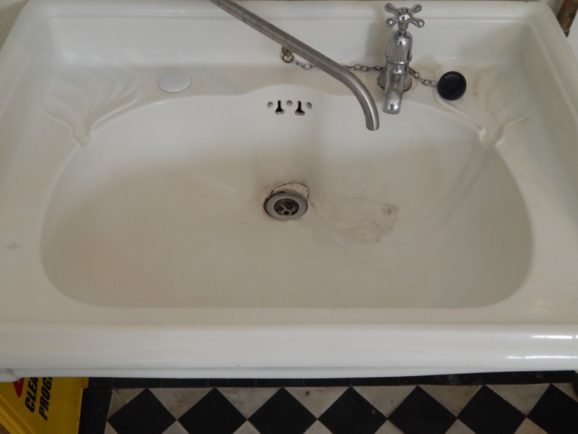
The picture below shows the cracks around the waste clearer. If you look closely you will be able to make out 2 hairline cracks coming up from the waste to the left hand side of the main crack.
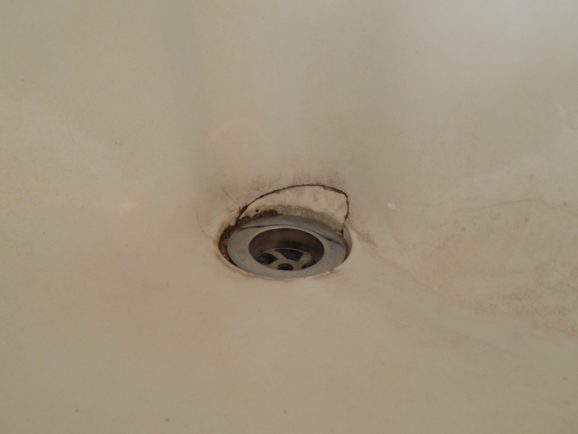
There was also a lot of discolouration and crazing in the area.
The brief for this job was to repair the cracks but to retain as much of the staining and discoloration as possible as this was, after-all, a museum and if the sink was made to look too pristine and perfect, it would no longer look like a genuine antique.
The first step was to open up all the cracks as much as needed to allow us to inject a two part glue into the area. This makes the area rigid and prevent the cracks from continuing to grow which is what tends to happen with things made from porcelian, such as this sink. Then the cracks were made good with fillers.
Finally a colour was made up. On a sink like this it can be tricky as the staining and wear mean that the surface is actually a hodgepodge of different shades of white. We had to choose an area of the sink to match the colour we made to. A colour was made up which matched the colour of the sink 2-3 inches above the cracks.
The made up colour was applied, covering the cracks. You can see the result below:
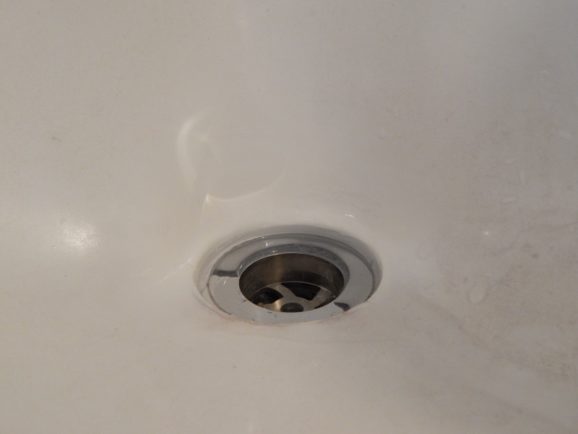
The cracks have gone. Unfortunately this meant we lost the strong discolouration that was just above the waste. But the colour we made up blends well so this look very natural. Also, the colour application was kept as local as possible which meant a lot of the other marks and dis-colouration around the waste were retained.
The final picture shows most of the sink and the repair:


 Add us to your circle