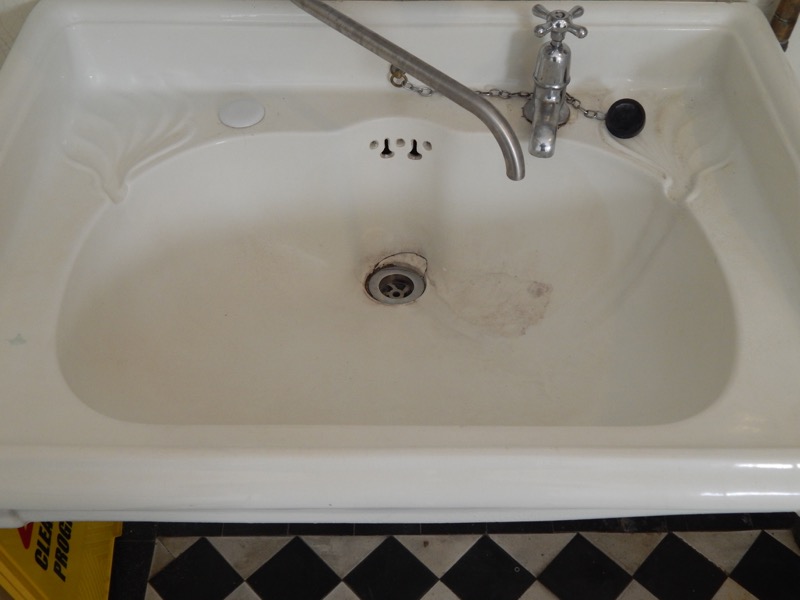
Badly Damaged Sink Fully Restored
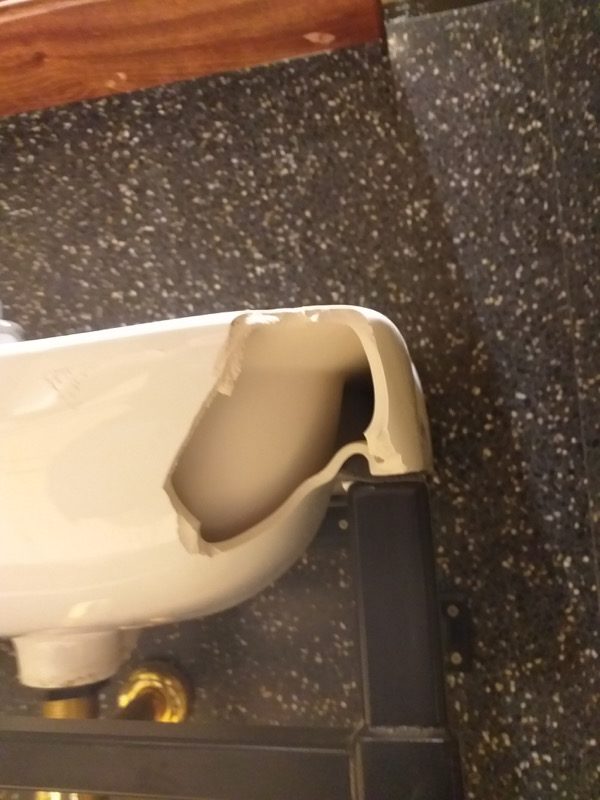
In Spring 2020, just before the lockdown, we were asked to repair and restore a bunch of sinks for a […]
In Spring 2020, just before the lockdown, we were asked to repair and restore a bunch of sinks for a […]
Resurfacing a Coloured Bath Primrose Bath. Whilst most the baths we do are white, there are people who have baths
Edwardian Sink. Cracked Sink Repair. The cracked sink repair outlined below was done for an Edwardian Museum in Brighton. The

Celebrating the emerging interior design trend of putting baths in bedrooms. Some traditionalists might venture that to put a bath
Here is a fun job we ended up getting. A chap called about an Art Deco Double Ended bath we
We were sorry to hear that this year there is no SALVO FAIR. After a run of 13 years straight
For most of us our bathroom is the smallest room in our home and with houses now shrinking in size,
Baths are a great way to help relax your tired and stressed body. A perfect bath can relieve you stresses
In recent years, showers have become just as much an important part of the bathroom as the bath. Whether you
Keeping your bath clean can be easy if you follow a few simple tips. Your bath can very easily build

